Importing SSL Certificates
When using CyberSource Toolkit for i, you might receive one of the following error messages depending on which version of CyberSource Toolkit for i you’re using:
- “Error performing SSL handshake. There is no error. RC(23) errno().”
- “SSL peer certificate or SSH remote key was not OK”
These error messages mean that you do not have the required certificate authorities installed on your IBM i to secure communication between your IBM i and CyberSource. This may occur during initial setup, or when CyberSource updates certificates on their server. Fortunately, this is easy to fix.
The necessary certificates can be downloaded as a zip file here: CyberSource SSL Certificates
Unzip the certificates - you should have the following certificates:
- 1_DigiCertGlobalRootG2.crt
- 2_DigiCertEVRSACAG2.crt
We have labeled each certificate file with a number indicating its installation order, with 1 being the root and further intermediate certificates being numbered sequentially. This process helps avoid confusion during installation.
Accessing DCM
To begin, verify that the *ADMIN HTTP server job is running with the following command:
WRKSBSJOB SBS(QHTTPSVR)
If you don’t see *ADMIN in the list, please run the following command to start it:
STRTCPSVR SERVER(*HTTP) HTTPSVR(*ADMIN)
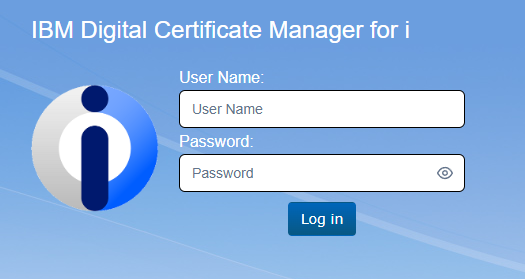
After you’ve ensured that the *ADMIN server is running, open a web browser, and go to http://YourIBMIPAddress:2006/dcm/ - you should see a login page as seen below:

You will want to log in to DCM using a profile with elevated permissions.
Open the *SYSTEM certificate store by first clicking on the “Open Certificate Store” link under the Actions header, then select *SYSTEM:

Enter your *SYSTEM store password when prompted and click “open”.
Uploading the Certificates
From the *SYSTEM certificate store, click “Upload Certificate” in the left-hand navigation menu:

Click the “Choose File” button to open a file browser:

Use the file browser to navigate to the location where you saved the previously downloaded certificate files. Select 1_DigiCertGlobalRootG2.crt:

Press “Upload”. Repeat for 2_DigiCertEVRSACAG2.crt. Once you have uploaded the certificates, you should see them listed under the “Certificates” heading on this same page:

Installing the Certificates
In the left-hand navigation menu, select the *SYSTEM store to return to the main page. Click the “Import” link at the top:

Select the type “Certificate Authority” and then click “Browse Uploads”:

This will bring up a list of the certificates that were previously uploaded to the system. You should see all of the certificates that we just uploaded in the list:

Select the 1_DigiCertGlobalRootG2.crt certificate.
Click the “Select” link above (or below) the certificate list. This will return you to the previous page and populate the Path field.

Click “Continue” to install the selected certificate:

On the next page, provide DCM with a recognizable label for the certificate. In our example, we have labeled the certificate “Cybersource Root”.

Click “Import”. You will either get a message that the import was successful, or a message that a certificate with the same label or public key already exists in the certificate store. The latter message is not necessarily an error - it just means that this certificate authority was already installed in your DCM and does not need to be installed again. If you get a different error message, please reach out to our team at isupport@katointegrations.com.
Repeat the import process for the 2_DigiCertEVRSACAG2.crt certificate. It is important that the certificates are imported in order, as each subsequent certificate authority relies on the previously imported certificates for validation and verification.